Leaves on this Family Tree

Withering Away

Showing posts with label Magic Circle. Show all posts

Friday, October 14, 2011

How To Make a Magic Circle

If you crochet,
I am sure you have read a pattern that says:
Start with a Magic Circle,
(adjustable loop, magic ring, etc.)
sc (hdc, dc, tc) so many
into the ring.

When you looked for the instructions
on how to make this,
you were still at a loss.

I am hoping my photo tutorial
will help you.
I am a very visual crocheter,
I need to see
"stop-action" pictures.
Videos move WAY to fast.

Make a loop around your index finger.

Pull a loop of yarn through the circle.
(Complimentary dog hair shown to the right not necessary.)


Insert hook into loop and pull through thread/yarn.
Notice the "White thread/yarn" that hangs behind the loop.
You will be working over this thread/yarn.

Chain 1


Single crochet into loop. . .
and over the circle and" background thread/yarn."

Now, you are ready to sc, into the loop as many times as needed.
Make sure you crochet over the "white background thread/yarn."
 
Sl st to beginning ch 1 and ch 1.
Place stitch marker here.
Notice the tail of the white "background thread/yarn"
hanging behind the circle.

Single crochet into the same space.
Notice the HUGE opening in the center.
I am holding the white "background thread/yarn"
up so you can see it better.


Pull on the white "background thread/yarn"
and the hole "miraculously disappears. 


Round 1: Make 2 sc in each stitch around . . .

Sc into beginning ch 1.
Place st marker here.
Round 2: Sc crochet in same st,* 2 sc in next st, 1 sc in next st,* repeat from * to * around to st marker.
Round 3: 2 Sc into st marker st, sc into next sat, *2 sc into next st followed by 1 sc into next 2 sts,* repeat from * to * until you reach st marker,
Round 4: 2 sc into st marker, sc in each of next 3 sts, *2 sc in next st followed by a sc in each of the next 3 sts, * repeat from * to * until you reach the st marker.

Continue this pattern until ready to fasten off.
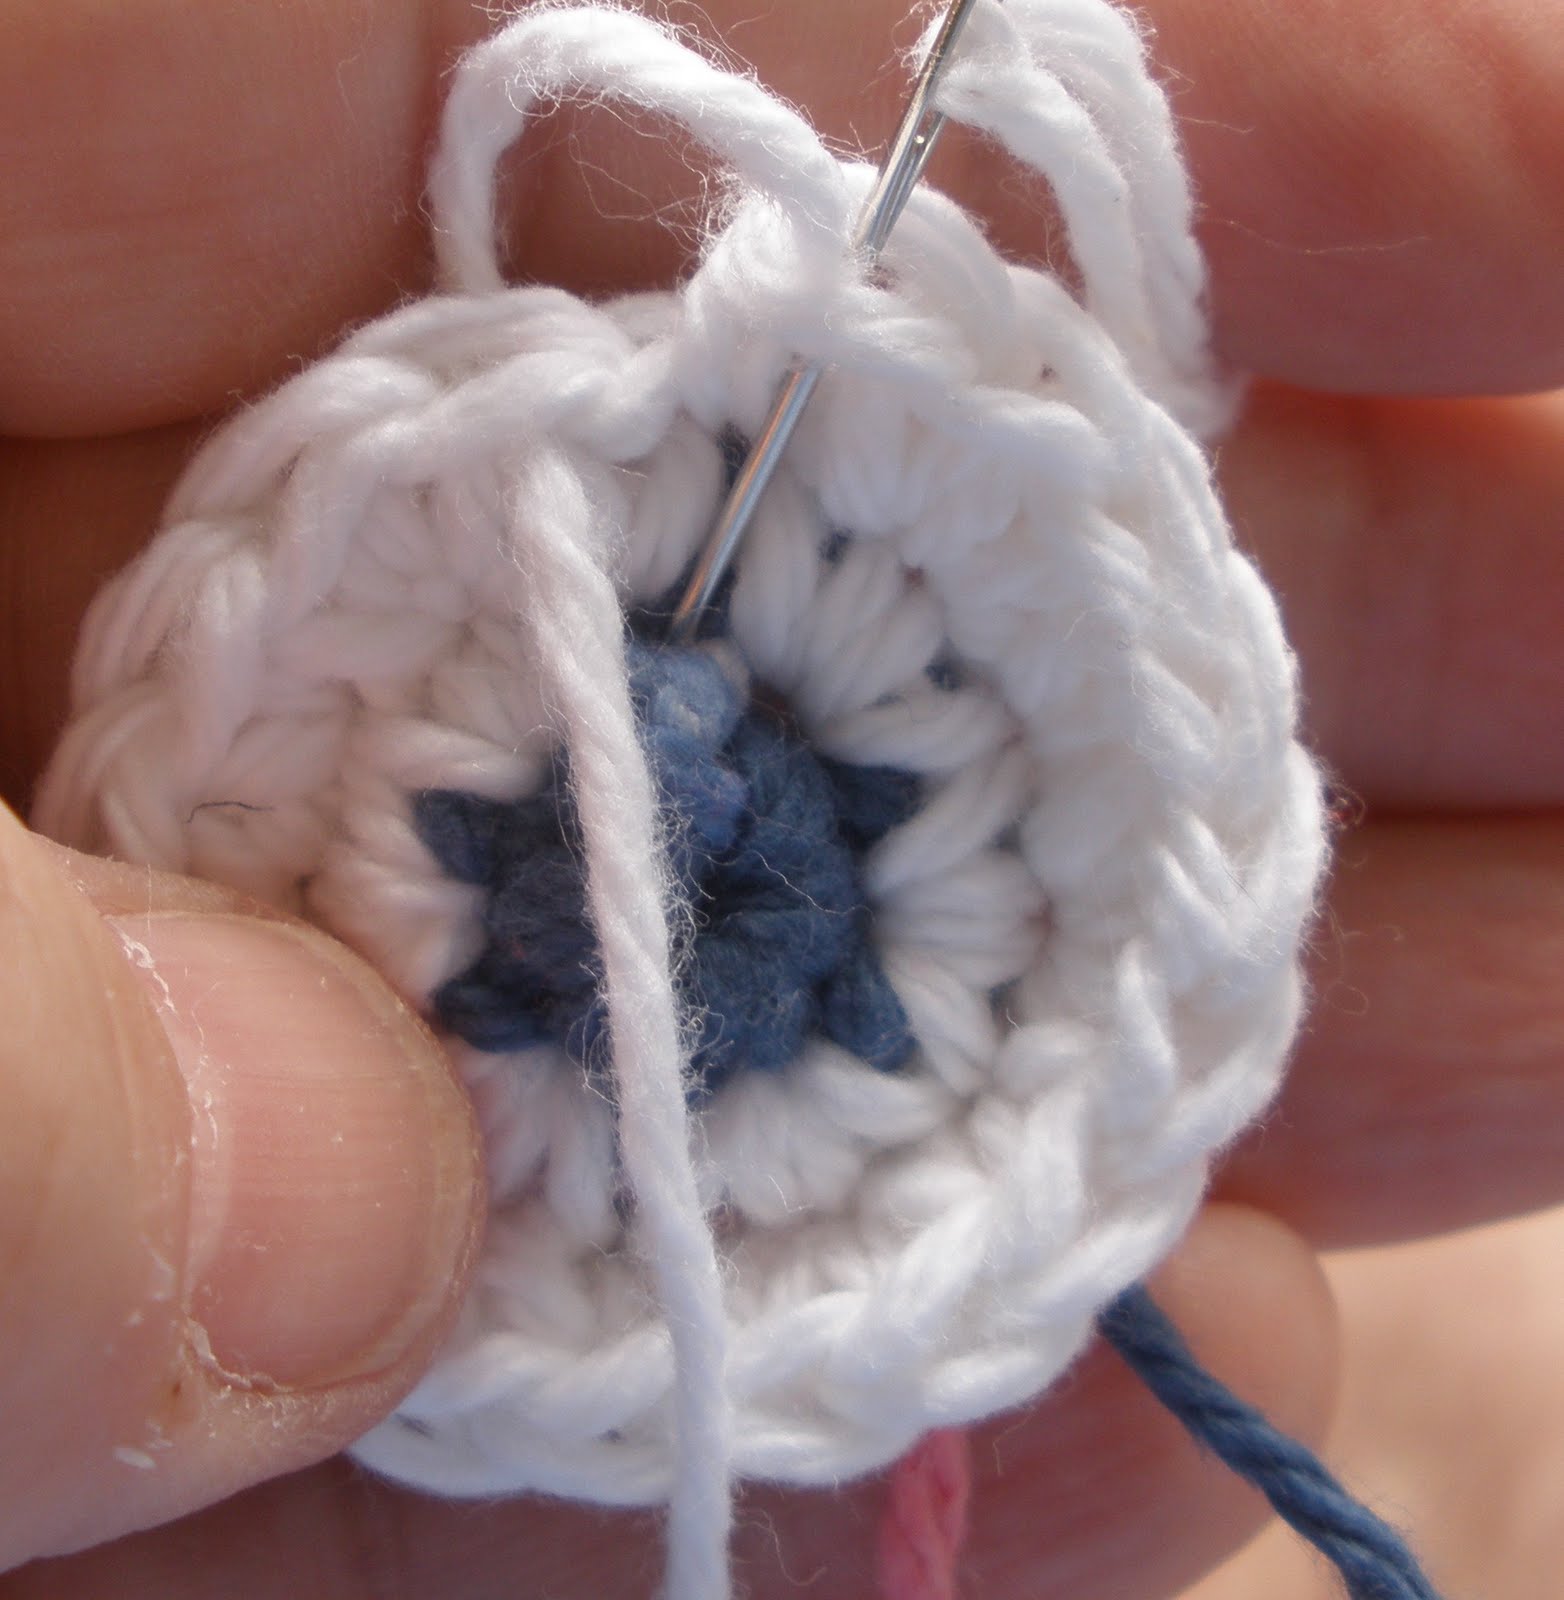
Cut yarn and thread onto a yarn/tapestry needle.
Run it under the st shown, then back down through the "opening" where the yarn emerged from the last st then bury it under the back of the sts of the round just completed or round below.

TA-DA . . . a GREAT CIRCLE emerges.
If it doesn't,
you may need to "re-adjust" the sts with your fingers.

 If you would like to print this information, please visit this link to The Fur~Babies Momma.
 Reproducing or transmitting this pattern by any means for any purpose other than personal or charity use  constitutes a violation of copyright law.                                                                                                                       


Sunday, June 26, 2011

Pay It Forward FREEBIE

I need a PAY IT FORWARD for everyone who has helped me.

Step 1:
Notice this variegated yarn has a white and pink (red) end.
Step 2:
The sc is made with the "red" yarn.
It catches (joins) the front and back of the loop.
If you like, you may move the "white" yarn
to the outside of the circle.
Step 3
Make sure your sc's are going over both loops
and that the white yarn is loose.
Step 4
I have joined white yarn so you can see what I am doing for Round 2.
Step 5
You either sl st to join here.
Personally, I ike for this to be the 1st sc of my 2nd rund.
Step 6
I am making the 1st sc of Round 2.
Step 7
Sc over 3 of the 4  yarn tails on the back.
DO NOT sc over the "white" tail from Step 1.
Leave the whole in the middle, we will fix it later.
Step 8
In this round you sc in the 1st st, then 2 sc in the rest.
Step 9
Last sc in round 2, ready to do round 3.
Step 10
REMEMBER, you are sc-ing OVER  the yarn tails.
Now, gently pull the "white" tail from Step 1.
This will close your center.
When yu finish, you will weave this tail in.
Step 11
The tail to the right is the one I pulled to close the whole.
If you see the other tails "popping up"
between your stitches, now is the time to "gently"
pull on them to smooth out the back.
REMEMBER to keep sc-in over the exsposed tails.
Step 12
It's MAGIC . .the red turned to blue . . =)
This shows the 1st 3 sc in round 3.
In STep 10, you *sc in the same st, then 2 sc in the next sc.*
You *repeat* this around this round.
Step 13
This is just a closer look at Step 12
Step 14
Round 3 is finished.
I am going to fasten off, but if you want to continue,
the progression for continuing this pattern
is at the bottom of this post.
Step 15
You will  notice in Step 12 there is some extra blue showing through.
I have used my needle to cover it in this photo.
NOTICE how I am fastening off . . .
I have cut the yarn, placed it on a needle,
ran the needle UNDER the next stitch
and back through the middle f the'
last stitch.
To actually finish it off, the needle needs to go to the  back
and then weave in until it is secure.
Step 16
I have pulled my yan too tight
so you can see my join.
DO you notice that the extra blue doesn't show through now?
Before I wove in my tail,
I did two long sts over that extra blue
to hide it.

Progression for a Circle.
Round 1: Sc around loop.
(I would suggest no fewer than 5 sc and no more than 12.)

Round 2: Sc in 1st st, *2 sc in the next followed by a sc in the next st,* rpeat to the end.

Round 3: Sc in 1st two sts, *2 sc in the next followed by a sc in the next 2 sts,* rpeat to the end.

Round 4: Sc in 1st three st, *2 sc in the next followed by a sc in the next 3 sts,* rpeat to the end.

Round 5: Sc in 1st four st, *2 sc in the next followed by a sc in the next 4sts,* rpeat to the end.

Round 6: Sc in 1st five st, *2 sc in the next followed by a sc in the next 5sts,* rpeat to the end.

Signed,
If You Have Any Questions, Just Ask