Leaves on this Family Tree

Withering Away

Showing posts with label crochet pattern - free. Show all posts

Monday, June 13, 2016

Between Meal Centerpiece

I can't believe I didn't post this. 
At least, I can't find where I posted it.

This is my Between Meal Centerpiece doily.

Between Meal Centerpiece
22" (+/-) in diameter


This is a free pattern.

My center tension was bad, but I didn't realize it until I blocked it.
So now I will need to make sure I place something over it
so the "swirl" formed won't show.

One day, I will make it again.
It isn't extremely difficult to make,
it is just LONG.

Tuesday, April 5, 2016

A Doily for 7 West


10 " (+/-) Diameter
7 West was the floor where my husband spent 3 week after his cancer surgery. They had the nicest nurses, aides and assorted staff members that we have ever met. They made us feel like family.  (I kidded them that Gene was that relative who came for Thanksgiving and never left.)

This doily was designed with them in mind. I hope you enjoy it.


MATERIALS
#10 Cotton Crochet Thread
     Color A - South Maid "Cream"
     Color B - Ant Lydia "Natural"
     Color C - Aunt Lydia
                    "Antique White"

Crochet Hook - B/1-2.25 MM
Scissors
Tapestry/Yarn Needle

Starch, or your preference of something that will stiffen the doily. (I prefer liquid starch.)

Straight Pins
Blocking Board  - Thick/heavy cardboard will work as well


ABBREVIATIONS and STITCHES - US terms
ch - chain
dc - double crochet
hdc - half double crochet
MC - Magic Circle http://furbabiesmomma.blogspot.com/2011/10/how-ro-make-magic-circle.html

Rnd(s) - round(s)
sc - single crochet
sk - kip
sl st(s) - slip stitch(es)
sp(s) - space(s)
tr - treble/triple crochet


PATTERN
Rnd 1: Using Color A and a MC, ch 3, place 1 more dc into the circle, sl st to top of beginning ch 3 to join. (12 dc)

Rnd 2: Sl st to sp between ch 3 and dc, ch 3, dc in same st, 2 dc in next dc and each dc around, sl st to top of Ch 3 to join, Fasten off Color A, join Color B.


Rnd 3: Using Color B, ch 7, *sk 1, sc in next st, ch 7,* repeat from * to * around, sl st into beginning sc to join.

Rnd 4: Sl st to 3rd ch, sc in ch, ch 4, dc in same ch, ch 3, *2 dc in next ch, ch 3,* repeat from * to * around, sl st to beginning sc to join. Fasten off Color B.


Rnd 5: Join Color C, in any ch 1, ch 3, 2 dc in same ch, ch 4,
*2 dc in next ch 1, ch 4,* repeat from * to * around, sl st to beginning ch 3 to join.

Rnd 6: Sl st to 1st dc, ch 4, tr in same st, dc in next st, (dc, 2 hdc, sc, 2 hdc, dc) in ch 4, dc in next st, *3 tr in next st, dc in next st, (dc, 2 hdc, sc, 2 hdc, dc) in ch 4, dc in next st,* repeat from * to * around, tr in st with ch 4 and tr, sl st to ch 4 to join. Fasten off Color C.


Rnd 7: Join Color A in any middle tr, ch 1, sc in same st, ch 2, sc in same st, ch 5, *sc in middle tr, ch 2, sc in same st, ch 5, * repeat from * to * around, sl st to beginning ch 1 to join.

Rnd 8: Sl st to ch, ch 1, *18 sc in ch, ch 2, * repeat from * to * around, sl st in beginning ch 1 to join.


Rnd 9: Sl st to 4th sc, ch 1, sc in same ch, *ch7, sk 7, sc in next st, * repeat from * to *
around, sl st to beginning sc to join.

 Rnd 10: Sl st to 4th ch, ch 1, sc in same ch, ch 7, *sc in next ch, ch 7, * repeat from * to *, sl st to beginning sc to join.


Rnd 11:Sl st to 4th ch, ch 9, sl st in 4th ch from hook, ch 5, *sc in next ch, ch 9, sl st in 4th ch from hook, ch 5, * repeat from * to * around, sl st in beginning sc to join, fasten off, weave in ends.


Finishing: Soak in starch, pin to block and allow to dry.


This pattern has not been tested. 
If you find any errors, please leave me a comment so I can fix it.

Wednesday, March 18, 2015

Catnip Doves

I haven't made anyting for our local No-Kill Maternity Dog and Cat shelter. I figured it was about time.


The pattern is very simple.


Catnip Doves
Materials and Supplies
#4 Worsted Weight Cotton
   Color A: I Love This Cotton                     “Fiesta”
   Color B: I Love This Cotton                    “Pink”
   Color C: I Love This Cotton                    “Baby Blue”
   Color D: I Love This Cotton                    “White”
  
   Crochet Hook: G/6-4.25MM
   Tapestry/Yarn Needle
   Scissors
   Polyester Fiberfill
   Catnip

Abbreviations and Stitches
 ch = chain
 dc = double crochet
 hdc = half double crochet
 Rnd = round
 sc = single crochet
sk = skip
sl st = slip stitch
sp = space
st(s) = stitch(es)
yo = yarn over
 MC – Magic Circle (http://furbabiesmomma.blogspot.com/2011/10/how-ro-make-magic-circle.html)
Notes
1.    Doves can be made with one 
          color or change colors.
2.   When joining a new color, 
       join it in the last part of the       
       previous st. (example shown is a sc, yo, 
            pull through, and then use the new color to finish 
            the st.)

BODY
Rnd 1: Using a MC, ch 2, make 10 hdc into the circle,
             sl st to beginning ch 2 to join, ch 2.

Rnd 2: 2 hdc in the same st, 2 hdc in each st around, 
             sl st to beginning ch 2 to join, ch 2.

Rnd 3: Hdc in the same st, *2 hdc in the next st,
             hdc in the following st,* repeat from * to * around, 
             sl st to beginning ch 2 to join, ch 2.

Rnd 4: Hdc in the same st and next st, *2 hdc in the next st, 
             hdc in the following 2 sts,* repeat from * to * around, 
             sl st to beginning ch 2 to join, ch 2.

Rnd 5: Hdc in the same st and next 2 sts, 
            *2 hdc in the next st, hdc in the following 3 sts,* 
             repeat from * to * around, sl st to beginning ch 2 to join, 
             fasten off, weave in end.


EDGING with TAIL, HEAD and BEAK
1.      Join yarn at the seam of the body, ch 1, sc in the same st.
2.      Fold circle in half to form body.
3.      Sc front and back together, stopping 10 sts from the end.
4.      NOTE: you may want to place 2 sc in some sts 
                     to keep the shape of the body rounded
5.      Stuff body with Fiberfill and Cat Nip.
6.      Continue scs to the end, ch 2, turn.
TAIL
7.      Place 2 hdc in the same st as the last sc, ch 2, turn.
8.      Place 2 hdc in the same st and 1 hdc in the next st, ch 2, turn.
9.      Dc in 1st st, 2 dc in the next st, ch 1.
10.  Sc down tail and into the base st of the tail, ch 1.
TOP EDGING
11.  Sc between Rnds 4 and 3, ch 1
12.  Sc between Rnds 3 and 2, ch 1.
13.  Sc between Rnds 2 and 1, ch 1.
14.  Sc between Rnds 1 and 2 on the other side of Rnd 1, ch 1.
15.  Sc between Rnds 2 and 3, ch 1.
16.  Sc between Rnds 3 and 4, ch 1.
17.  Sc at the base of Rnd 4.
HEAD
18.  Place at between 9 and 11 dc in the same st as the last sc,
         sl st to edging, ch 2, turn.
BEAK and FINISHING HEAD
19.  Dc in the 1st st
20.  Sc in remaining sts on the head, sl st to the back edging, 
       fasten off, weave in end.

Thursday, October 23, 2014

Hippo Hat

When I first saw this hat, it made me smile. I knew I had to make it for Miss E.


The pattern is by Carolyn Guzman and here is the link. It's free.

The original pattern didn't have ear flaps, but I decided to add them
.


Sunday, October 19, 2014

Start of an Olaf Hat and a Finished Elsa-like Hat

My niece, "L", suggested I make hats for the characters in frozen for my great niece "E", who is "L's" niece . . . still with me :)

I haven't watched the movie, but is there any person out there who hasn't  seen pictures of the characters?

I started on Olaf . . . he makes me laugh. I would have gotten him finished but I couldn't find the black yarn I was using.
Not sure about the "buck tooth." But I didn't want the edge of the hat going into the forehead of "E." So I guess she has a goofy hat for a goofy character.

Then yesterday, I started an Elsa hat. Somewhere I saw a picture of an Elsa hat where the yarn for the braid was "woven" through the hair (edge of the hat) to the place of the braid.  I didn't like the way the braid laid, but I liked the idea. 

So, my readers, here is the end result.

I know the braid is L*O*N*G ! ! ! ! !
(I used 62" pieces of yarn.)
I wanted to make sure it was
log enough to look "Elsa-ish"
and figured E's momma could trim it to size.


I'm happy with the way the
"peaks" of the "crown" came out.
Those of you who crochet
know that these "peaks"
can come out,
almost,
slanted if you aren't lucky.
So I was lucky this time.


Hopefully, in the photo above,
or below,
you can see how I added the "braids."
I did a *sc, ch 1, sk 1"
so the braid yarn could fit in the ch sp.


The bottom of the braid looks rather rough.
but in person, it is smooth.

When I finally finish Olaf, and make an Anna hat, I will have patterns ready and they will be free . . .mainly because they were all so easy to make and I hope it will give more women the chance to make them for their kids for Christmas.


Monday, October 6, 2014

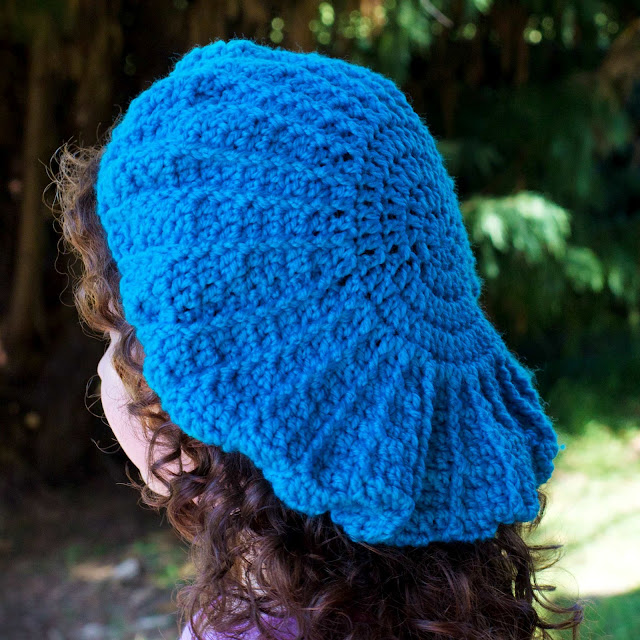
Medieval-ish Hood

Not sure is Medieval-sh as an acceptable word
but, then again, where do sportscaster get off using "physicality?"
However, when I saw the picture of this
I immediately thought
of the headpiece a knight
wears under his armor.


This is a winter hat 
made using Lion Brand Homespun
in the color "Mimosa."


You can barely see the buttons.
I fund them at JoAnne's today.
 wanted something that would blend in . . . 
looks like I accomplished it.
They are actually a clear,
iridescent pint hearts.


This pattern is available in my Ravelry Store for FREE
Just click on the link below.


All proceeds from this pattern will be donated 
to a no-kill animal shelter in Western New York 
or one my home state of Indiana. 
The Fur~Babies and I thank you for your purchase

Tuesday, July 29, 2014

French Beret

I saw this pattern and I was in L*O*V*E ! ! ! ! !

so I was "hooked."
Get it . . . 
HOOKED . . . LOLOL

Of course, I made mine smaller
for my 2 year old Miss E.

What do you think?
Red Heart Boutique, Unforgettable, "Echo"

 I made my "brim" wider.
Why?
I just like them that way.


I also like accents.
With the colors,
I thought a rough bow,
 made from the yarn,
 would look cute.

What do you think?


Saturday, March 15, 2014

Soft Cotton Cardi Sweater


This pattern is named "soft cotton cardi sweater"
and was designed by Katya Novikova.
My only problem was I used variegated yarn.
It worked perfectly until I put the third strip in.
I didn't notice it had "varied" to a light green
until I was to far past it to frog.
What do you think of  my model?
My neighbor boy, who is the right age for the sweater,
modeled it for me, but wouldn't stand still for a pix.
Well, I guess I could have but I'm lazy.
So I made a bunny applique
to place over it.
I think that worked.

I used Deborah Norville
Serenity Sock Yarn
for this sweater.

Wednesday, February 12, 2014

Valentine's Doily

Here is my latest finish,
Serendipity Hearts Doily by Dearest Debi.


Isn't it a pretty pattern?
The BEST thing is
it is EASY PEASY ! ! ! ! !

If you would like to make it.
HERE is the pattern.

Friday, January 24, 2014

Braided Cowl Pattern

I just LOVE this cowl. The only thing I will do differently next time is ch 300 at the beginning so I will be able to wrap the cowl around my neck 3 times


Materials
Worsted Weight Yarn - 3 complimentary colors
Crochet Hook = K
Scissors
Yarn/Tapestry Needle

Stitches
ch = chain
dc - double crochet


Pattern
Row 1: Ch 200, dc in 3rd ch form hook and each chain to the beginning, ch 2, turn.

Rows 2 - 4: Dc in each st across, ch 2, turn.

Row 5: Dc in each st across, fasten off and weave in ends.

Repeat Rows 1 - 5 with two complimentary colors.

Finishing:

  1. Braid three strips together. 
  2. Join matching ends when braiding is complete. 
  3. Slip stitch or whip stitch matching ends together.

Monday, December 9, 2013

Stegosaurus Hat . . . Version II

This is SO MUCH Cuter than the last stegosaurus hat I made.

I just LOVE the ties.
It is SO HARD to find cute ties for a boys hat
and these ties are C*U*T*E ! ! ! ! !


If you would like this pattern it is FREE in my Ravelry Shop,
just click above.


Sunday, September 22, 2013

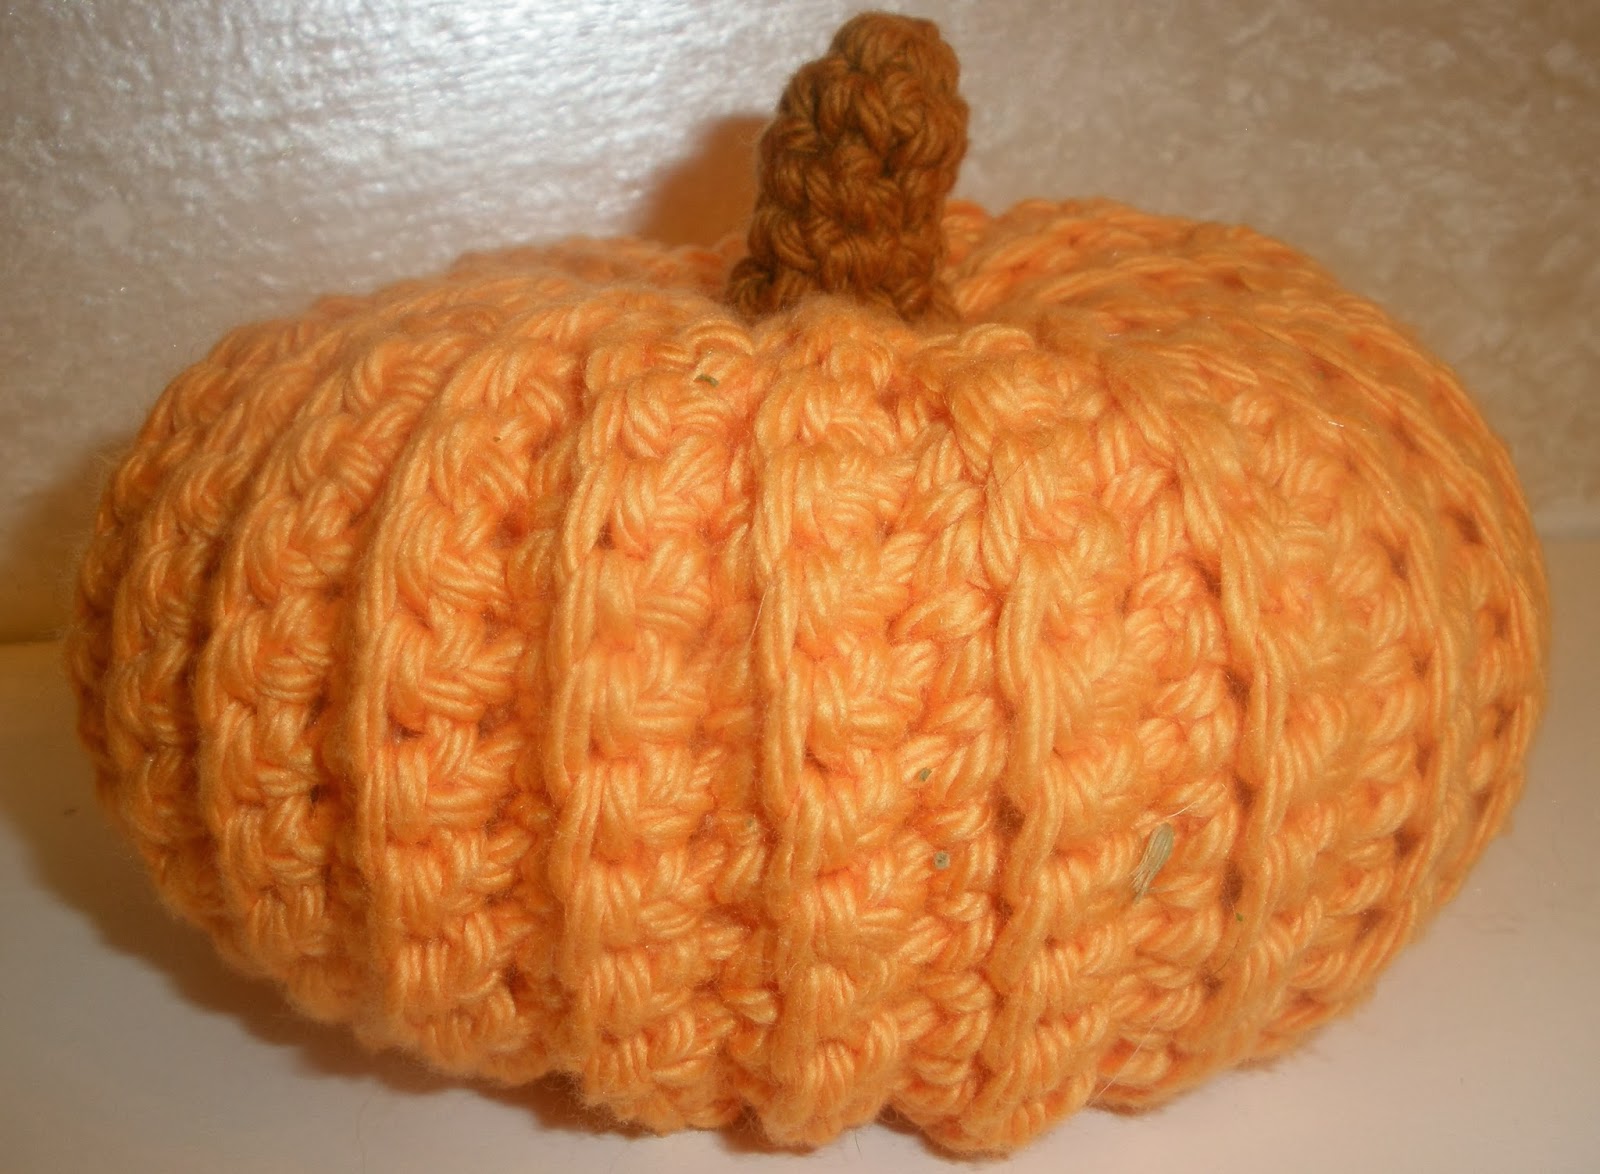
Pumpkin Stuffie . . . 2013


Approximately 3" in diameter and 2" tall.
Made out of Cotton a'la Mode

This is a "stuffie" that you could make as a decoration for your fall display OR do what I did, add 2 - 3 tablespoons of catnip to the middle f the stuffing and they become a fall catnip toy. Mine are going to Pet Connections, Inc. in Marilla, NY for Penny's Life Fund. 

Penny is a 7 year old beagle who just had 10 babies and has several medical problems facing her when the babies are weaned, so any amount of money they can bring in for her medical bills is appreciated. (Read that as Please donate anything you can to help this sweet baby and her babies out.)


Materials:
   #3 Yarn in three colors: pumpkin color, stem color and vine/tendril/leaf color
  Crochet Hook: E/4-3.50mm
  Scissors
Stitch Markers
Polyester Fiberfill / Stuffing
  Catnip, if needed for cat toy

 ABBREVIATIONS and STITCHES
bl – back loop

sc – single crochet
ch – chain

sp(s)  - space(s)
hdc – half double crochet

st(s) – stitch(es)
Rnd(s) – round(s)

tc – treble crochet
    MC – Magic Circle (http://furbabiesmomma.blogspot.com/2011/10/how-ro-make-magic-circle.html)

NOTES                                                                                                               
1.      Any yarn will work, just match the appropriate hook with it.
2.      You want a hook that will make the yarn tight, so the stuffing stays  
       inside the pumpkin.

PUMPKIN
Row 1: Ch 21, sc in 3rd ch from the hook, sc in the next 15 sc, ch 1,
             turn. (16 sc and 4 empty sts)

Row 2: Sc in bl of the same st and the next 11 sts, ch 1, turn.
             (12 sc and 4 empty sts)

Row 3: Sc in bl of the same st and the next 11 sts and 4 empty sts,
             ch 1, turn. (16 sc)

Row 4: Sc in bl of the same st and the next 15 sts and 4 empty sts,
             ch 1, turn. (20 sc)

Row 5: Sc in bl of the same st and the next 15 sts, ch 1, turn.
              (16 sc, 4 empty sts)

Repeat Row 2 – 5 until you have completed 63 Rows.

Joining
Row 64: Match Row1 with Row 63, sc the bl of all sts in Row 63
              (including the 4 skipped sts) to Row 1. Fasten off leaving a
              LONG tail for finishing.

FINISHING
1.       Weave tail through ends of rows and pull tightly, fasten off and leave tail 
        on the inside of the pumpkin.
2.       Cut another piece of yarn and weave through the other ends of the pumpkin.
3.       Tightly stuff pumpkin.
4.       Pull ends of yarn (in step 3) tightly to close the center.
5.       Knot yarn, weave both pieces through  the center close made in 
        Step 1 above and back to the top.

Notice how the center indents like a pumpkin?
6.       Pull both ends to give your pumpkin its shape.
7.       Fasten off and bury yarn in the stuffing.


STEM: do not join at the end of the rnd work in a spiral.
Rnd 1: Using brown, and a MC, ch 1 and make 5 dc into the ring, Mark
             beginning of next Rnd with a st marker.

Rnds 2 – 5: sc in each st, fasten off after last rnd leaving a long tail for joining.

Join stem over the center close at the top of the pumpkin. 
(Decide which center of the pumpkin may need to be hidden, 
 this will be the top.)

VINE TENDRIL
1.       Using green yarn, chain 30, make 2 sc in the 3rd ch from hook and each
       ch to the beginning, fasten off leaving a long tail for joining.
2.       Attach to center of close of pumpkin then attach stem to hide tendril attachment.

VINE with LEAF
1.       Follow pattern for Vine Tendril, DO NOT fasten off.
2.       Ch 8, sc in 3rd ch from the hook, hdc in next ch, dc in next 2 chs
        and tc in the last ch, fasten off leaving a long tail for attaching to pumpkin.
3.       Attach step through top of vine and leaf to pumpkin.


Approximately 3" in diameter and 2" tall.
Made out of Cotton a'la Mode

Approximately 4.5" in diameter and 3" tall.
Made out of Red Heart Super Saver.
For printing this pattern. click on the Printer/PDF icon below or, click this link to download the pdf pattern from my Ravelry Store.