


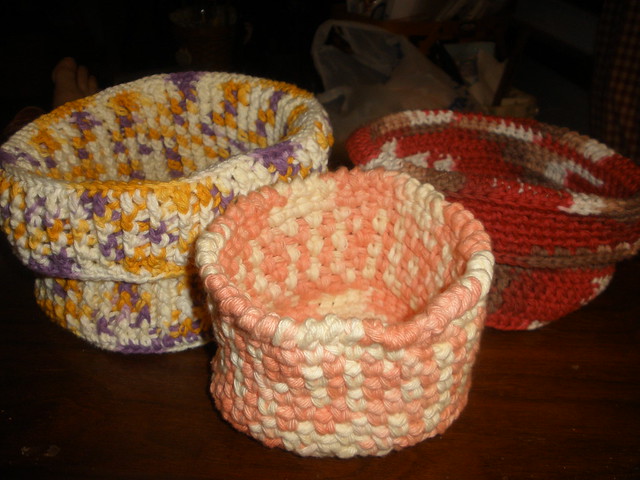
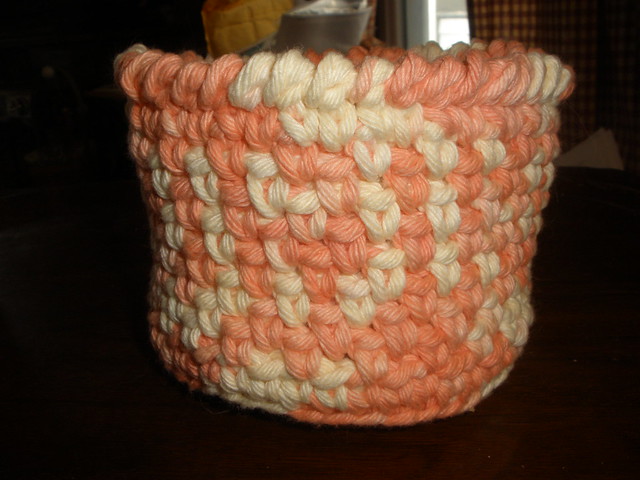
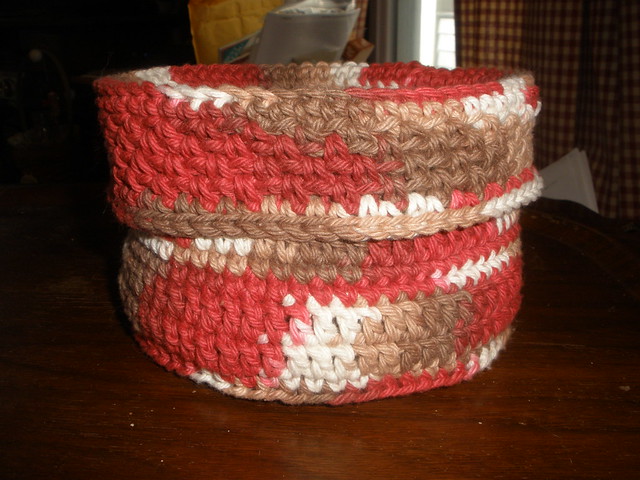
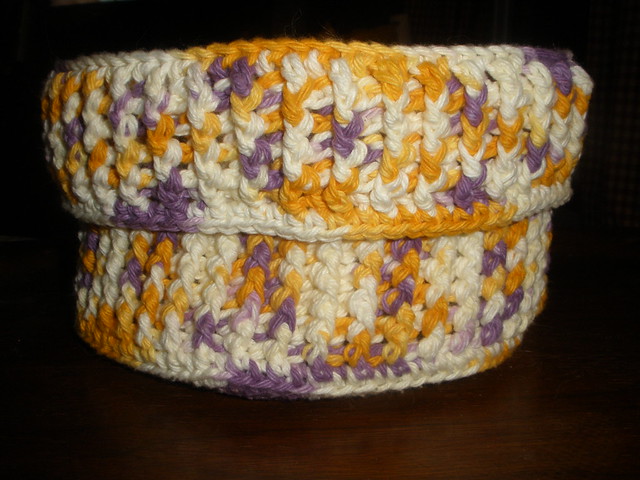
The husband likes the smallest basket best. I think that is because it is made with a very thick cotton (double worsted weight) and the sides stand up so straight. Personally, I like the largest one with the ribbed pattern on the sides. It took the longest to do the sides, but I really like the final product.
Next time I make them, I think I will double the yarn . . . the thicker yarn holds it shape better than the thinner yarn. But, to each his own . . . experiment and see which you prefer.
~**~**~**~**~**~**~
This pattern is going to be written very loosely, since the sizes will change as you wish.Materials:
Any type of yarn
Shown:
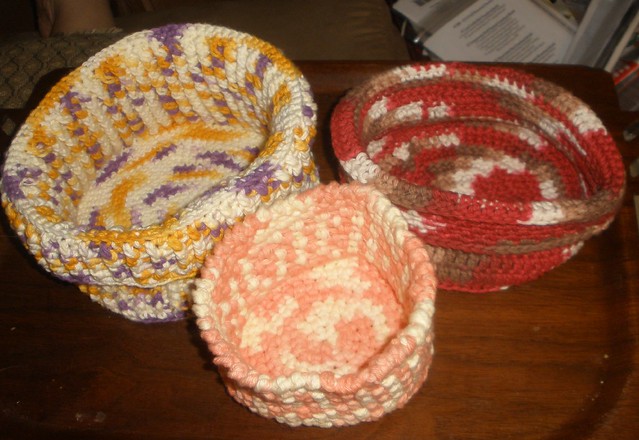
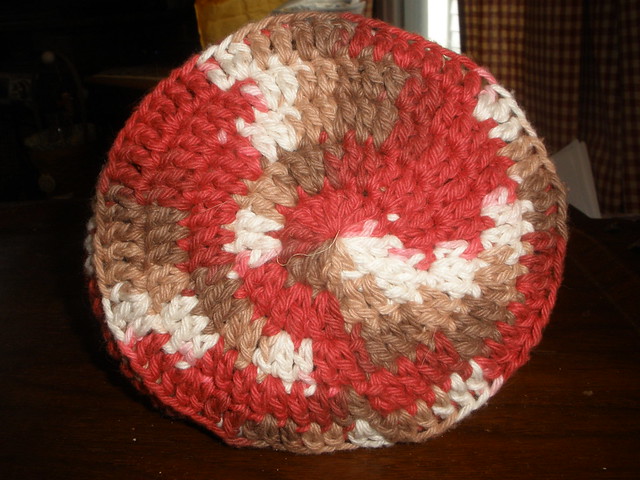
Small basket (4" diameter - double worsted weight cotton yarn
Medium (6" dia) and Large (8" dia) - worsted weight cotton yarn
Crochet Hook
I/9 - 5.50mm for small basket
F/5 - 3.75mm for medium and large
Tapestry/Yarn needle Stitch Marker
Abbreviations:
Magic Circle/Magic RIng/Adjustable Circle - links given
BPDC - back post double crochet
FPDC - front post double crochet
BSSC - back st single crochet
ch - chain
dc - double crochet
sc - single crochet
Reverse Single Crochet / Crab Stitch = link given
sk - skip
sl st - sl stitch
st(s) - stitch(es)
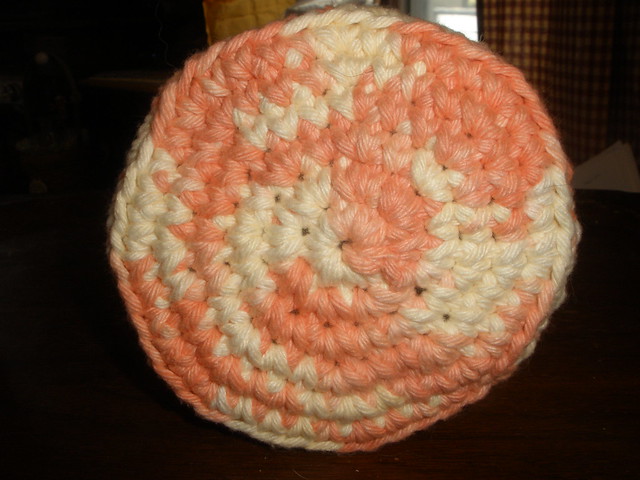
Base for small and large baskets:
Make a Magic Circle, Magic Ring, Adjustable Circle . . whatever you wish to call it. (If you have never done one of these, check the link . . . it is THE BEST photo tutorial I have seen.)
Round 1: Ch 1, make 8 sc into the circle, sl st to beginning ch 1 to join, ch 1.
Round 2: Sc in same st as joining make 2 sc in each st around, sl st to beginning ch 1 to join, ch 1.
Starting on Round 3 you will be doing continuous rounds. Place a marker at the beginning of each round.
Round 3: Sc in same st as joining, *1 sc in next st followed by 2 sc in the next st,* repeat between * and * around to end. (If you need to add an extra sc to the end, no problem.)
Round 4: * 2 sc in next st, 1 sc in each of the nest 2 sts,* repeat between * and * around to the stitch marker.
Round 5: * 2 sc in next st, 1 sc in each of the nest 3 sts,* repeat between * and * around to the stitch marker.
Round 6: * 2 sc in next st, 1 sc in each of the nest 4 sts,* repeat between * and * around to the stitch marker.
Continue in this pattern until the base of your basket is the size you want. Remember to move the stitch marker to show the beginning of each round.
 Side of Small Basket:
Round 1: Ch 1, sc in same st and each st around, sl st to beginning ch 1, ch 1.
Round 2: sc in same st, ch 1, sk 1 st,* sc in next st, ch 1, sk 1 st,* repeat between * and * around to the end, sl st to beginning ch 1, ch 1.
Repeat Round 2 until you reach the size basket you prefer.
Finishing Edge
Use a stitch called the Reverse Single Crochet / Crab Stitch. If you do not know how to do it try this You Tube link.
**~**~**~**~**~**~**~**~
Base:
Make a Magic Circle, Magic Ring, Adjustable Circle . . whatever you wish to call it. (If you have never done one of these, check the link . . . it is THE BEST photo tutorial I have seen.)
Round 1: Ch 1, make 8 sc into the circle, sl st to beginning ch 1 to join, ch 1.
Round 2: Sc in same st as joining make 2 sc in each st around, sl st to beginning ch 1 to join, ch 2.
Round 3: Dc in same st as joining, *1 dc in next st followed by 2 dc in the next st,* repeat between * and * around to end, sl st to beginning ch 2 to join, ch 1. (If you need to add an extra dc to the end, no problem.)
Round 4: * 2 sc in next st, 1 sc in each of the next 2 sts,* repeat between * and * sl st to beginning ch 1 to join, ch 1.
Round 5: * 2 sc in next st, 1 sc in each of the next 3 sts,* repeat between * and * sl st to beginning ch 1 to join, ch 2.
Round 6: Dc in same st as joining, *1 dc in each of the next 4 sts dc in the next st followed by 2 dc in the next st,* repeat between * and * around to end, sl st to beginning ch 2 to join, ch 1.
Continue in this pattern until the base of your basket is the size you want. Remember to move the stitch marker to show the beginning of each round.
 Side of Medium Basket:
Round 1: Ch 1, sc in same st and each st around, sl st to beginning ch 1, ch 2.
Round 2: Dc in same st and in each st around, sl st to beginning ch 2, ch 2,
Round 3: Repeat Round 2 but ch 1 at the end.
Round 4: Repeat Round 1 EXCEPT ch 1 at the end.
Repeat from Rounds 1-4 until you have the height you desire. Finish last Round of side with a ch 1 and turn.
Collar
Round 1: Do a BSSC in each st around, ch 1.
Repeat Side of Small Basket until you have a "collar" you like.
Next to last Round: sc in each st around, ch 1.
Final Round: Do a Back Stitch into each stitch. (If you have never done this, it is similar to a ch EXCEPT you go through a stitch before you pick up the yarn and pull it through to make the chain.
**~**~**~**~**~**~**~**~
Large Basket
 Base
BaseRepeat pattern for Small Basket base until you reach the size you desire.
Side of Large Basket:
Sl st final st of last round to the 1st st of the round.
Round 1: Ch 1, sc in same st and each st around, sl st to beginning ch 1, ch 2.
Round 2: Dc in same st and each st around, sl st to join, ch 2.
Round 3: *FPDC around 1st st, BPDC around 2nd st,* repeat from * to * until you reach the beginning, sl st to beginning ch 2, ch 2.
Repeat Round 3 until you reach the desired height for your basket. End with a sl st to last dc and ch 1.
Collar:
Round 1: Sc in same st and each st around.
Round 2 - ?: Repeat Round 3 of the side of this basket until your collar is the size you like. On the last round, end with a ch 2.
Final Round: Sc in each st around, st st to beginning ch 2, fasten off and weave in end.
If you would like to print this post, visit my Fur~Babies Momma Blog via this link.
This pattern has not been tested.
Please let me know of an mistakes,
errors
or any general questions you may have
by leaving a comment on this post.
©2008 - 2011 Paula Gaumer Tooke
Reproducing or transmitting this pattern
by any means for any purpose other than personal or charity use
constitutes a violation of copyright law.


I like them all but I think my fav is the big one too. I like the colors. :o)
ReplyDeleteThe printer is missing at the bottom of the post....or am I just blind? :o)
ReplyDelete