


 |
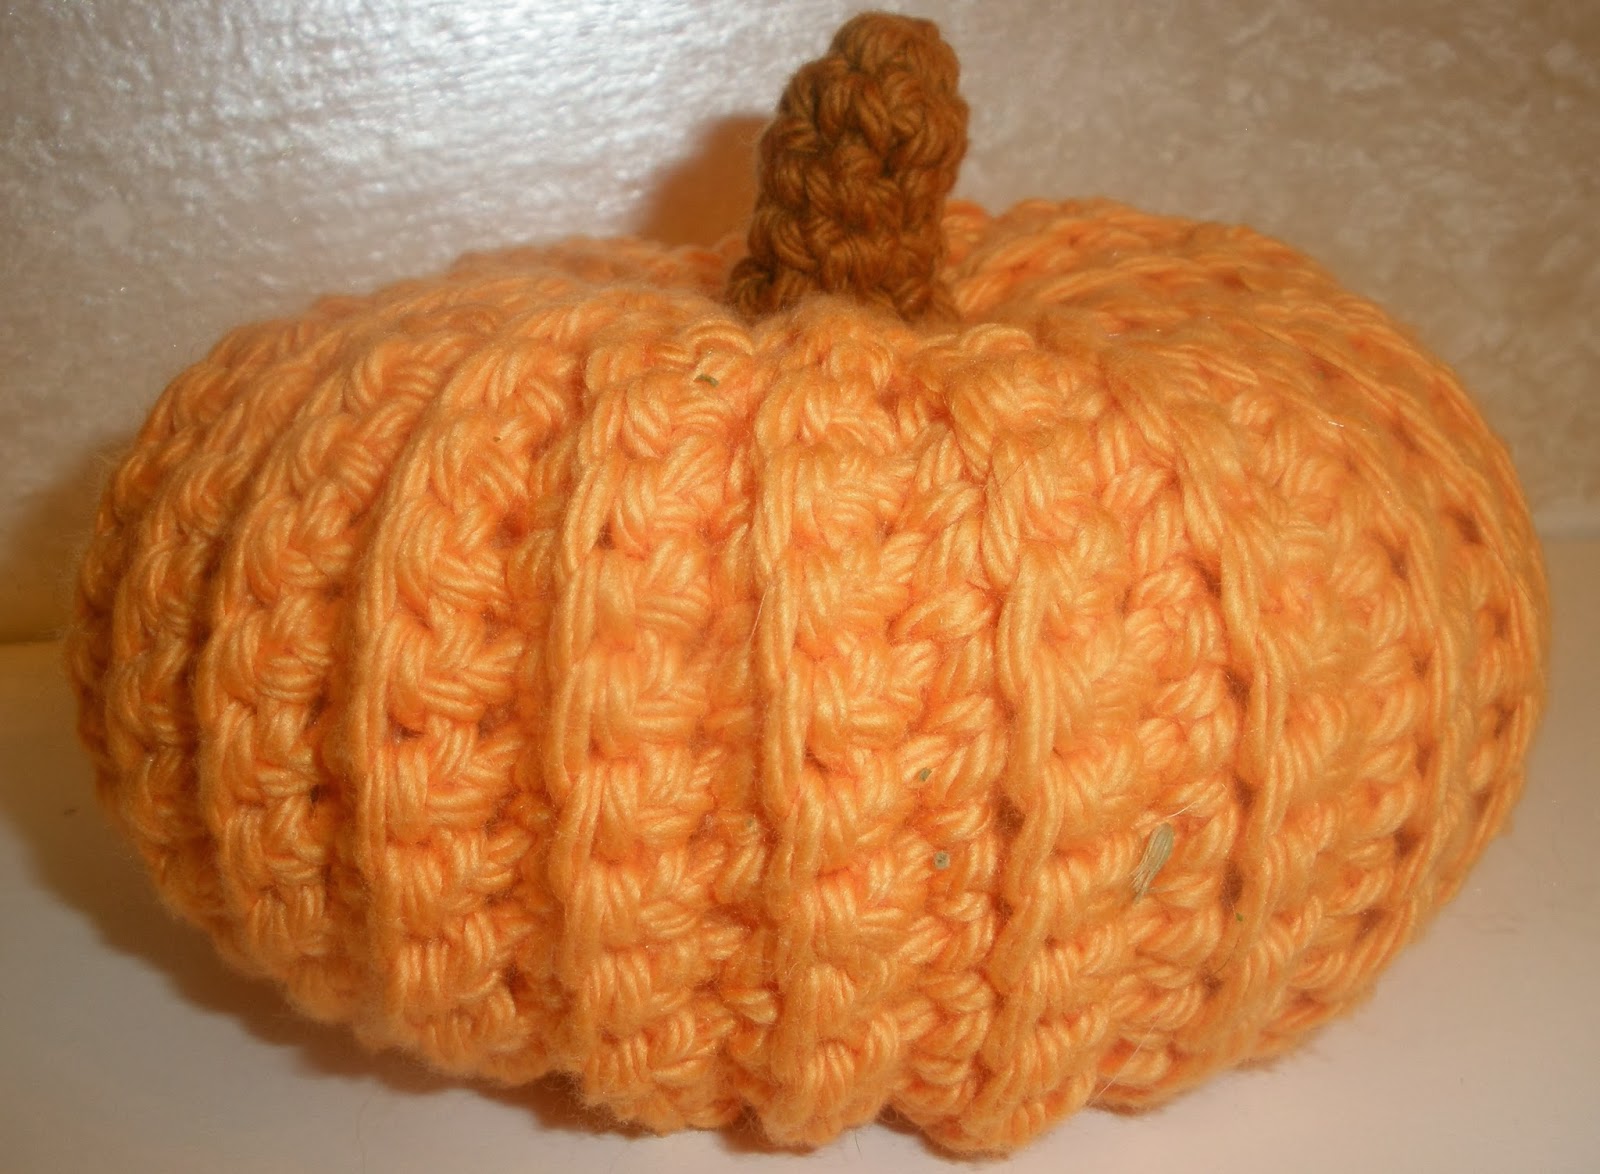
| Approximately 3" in diameter and 2" tall. Made out of Cotton a'la Mode |
This is a "stuffie" that you could make as a decoration for your fall display OR do what I did, add 2 - 3 tablespoons of catnip to the middle f the stuffing and they become a fall catnip toy. Mine are going to Pet Connections, Inc. in Marilla, NY for Penny's Life Fund.
Penny is a 7 year old beagle who just had 10 babies and has several medical problems facing her when the babies are weaned, so any amount of money they can bring in for her medical bills is appreciated. (Read that as Please donate anything you can to help this sweet baby and her babies out.)
Materials:
#3 Yarn in three colors: pumpkin color, stem color and vine/tendril/leaf color
Crochet
Hook: E/4-3.50mm
|
|||||||||||||||||
Scissors
|
|||||||||||||||||
NOTES
|
||
1.
Any yarn will work, just match the appropriate
hook with it.
2.
You want a hook that will make the yarn tight, so the
stuffing stays
inside the pumpkin. |
||
PUMPKIN
|
||
Row 1: Ch 21, sc in 3rd
ch from the hook, sc in the next 15 sc, ch 1,
turn. (16 sc and 4 empty sts) |
||
Row 2: Sc in bl of the
same st and the next 11 sts, ch 1, turn.
(12 sc and 4 empty sts) |
||
Row 3: Sc in bl of the
same st and the next 11 sts and 4 empty sts,
ch 1, turn. (16 sc) |
||
Row 4: Sc in bl of the
same st and the next 15 sts and 4 empty sts,
ch 1, turn. (20 sc) |
||
Row 5: Sc in bl of the
same st and the next 15 sts, ch 1, turn.
(16 sc, 4 empty sts) |
||
Repeat Row 2 – 5 until you
have completed 63 Rows.
|
||
Joining
|
||
Row 64: Match Row1 with
Row 63, sc the bl of all sts in Row 63
(including the 4 skipped sts) to Row 1. Fasten off leaving a LONG tail for finishing. |
||
FINISHING
|
||
1. Weave
tail through ends of rows and pull tightly, fasten off and leave tail
on the inside of the pumpkin.
2. Cut
another piece of yarn and weave through the other ends of the pumpkin.
3. Tightly
stuff pumpkin.
4. Pull
ends of yarn (in step 3) tightly to close the center.
5. Knot
yarn, weave both pieces through the center close made in
Step 1 above and back to the top.
6. Pull
both ends to give your pumpkin its shape.
7. Fasten
off and bury yarn in the stuffing.
|
||
STEM: do not join at
the end of the rnd work in a spiral.
|
||
Rnd 1: Using brown, and a
MC, ch 1 and make 5 dc into the ring, Mark
beginning of next Rnd with a st marker. |
||
Rnds 2 – 5: sc in each st,
fasten off after last rnd leaving a long tail for joining.
|
||
Join stem over the center close at the top of the pumpkin.
(Decide which center of the pumpkin may need to be hidden, this will be the top.) |
||
VINE TENDRIL
|
||
1. Using
green yarn, chain 30, make 2 sc in the 3rd ch from hook and each
ch to the beginning, fasten off leaving a long tail for joining.
2. Attach
to center of close of pumpkin then attach stem to hide tendril attachment.
|
||
VINE with LEAF
|
||
1. Follow
pattern for Vine Tendril, DO NOT fasten off.
2. Ch
8, sc in 3rd ch from the hook, hdc in next ch, dc in next 2 chs
and tc in the last ch, fasten off leaving a long tail for attaching to pumpkin.
3. Attach
step through top of vine and leaf to pumpkin.
|

 |
| Approximately 3" in diameter and 2" tall. Made out of Cotton a'la Mode |
 |
| Approximately 4.5" in diameter and 3" tall. Made out of Red Heart Super Saver. |


This is so adorable. Thanks for sharing.
ReplyDeleteHi I love the pumpkin you made, so cute!
ReplyDeleteI saw it on Hookin on hump day.
Julie @ julieslifestyle.blogspot.com
It is really nice to see others who care about animals the way you do. I got this pattern a couple of years ago and have used it every year in the fall to make catnip toys for cats and squeaky toys for dogs that I donate to the Humane Society in San Antonio, TX. They take in dogs and cats that are on the kill list at the pound and give them another year to be adopted. These agencies all do great work and need all the support we can give them.
ReplyDeleteHave you ever made the Pet Christmas Stocking from Red Heart?
Deletedog link http://www.redheart.com/free-patterns/dog-paws-christmas-stocking
cat link: http://www.redheart.com/free-patterns/cat-paws-christmas-stocking
Personally, I leave the bone and fish off and add a cuff to the top and a hanger, They sell VERY WELL.
Here is the link to my Pet Stockings in the blog: http://www.redheart.com/free-patterns/cat-paws-christmas-stocking
Delete