


I need a PAY IT FORWARD for everyone who has helped me.
Step 1:
 |
| Notice this variegated yarn has a white and pink (red) end. |
Step 2:
 |
| The sc is made with the "red" yarn. It catches (joins) the front and back of the loop. If you like, you may move the "white" yarn to the outside of the circle. |
Step 3
 |
| Make sure your sc's are going over both loops and that the white yarn is loose. |
Step 4
 |
| I have joined white yarn so you can see what I am doing for Round 2. |
Step 5
 |
| You either sl st to join here. Personally, I ike for this to be the 1st sc of my 2nd rund. |
Step 6
 |
| I am making the 1st sc of Round 2. |
Step 7
 |
| Sc over 3 of the 4 yarn tails on the back. DO NOT sc over the "white" tail from Step 1. Leave the whole in the middle, we will fix it later. |
Step 8
 |
| In this round you sc in the 1st st, then 2 sc in the rest. |
Step 9
 |
| Last sc in round 2, ready to do round 3. |
Step 10
 |
| REMEMBER, you are sc-ing OVER the yarn tails. Now, gently pull the "white" tail from Step 1. This will close your center. When yu finish, you will weave this tail in. |
Step 11
 |
| The tail to the right is the one I pulled to close the whole. If you see the other tails "popping up" between your stitches, now is the time to "gently" pull on them to smooth out the back. REMEMBER to keep sc-in over the exsposed tails. |
Step 12
 |
| It's MAGIC . .the red turned to blue . . =) This shows the 1st 3 sc in round 3. In STep 10, you *sc in the same st, then 2 sc in the next sc.* You *repeat* this around this round. |
Step 13
 |
| This is just a closer look at Step 12 |
Step 14
 |
| Round 3 is finished. I am going to fasten off, but if you want to continue, the progression for continuing this pattern is at the bottom of this post. |
Step 15
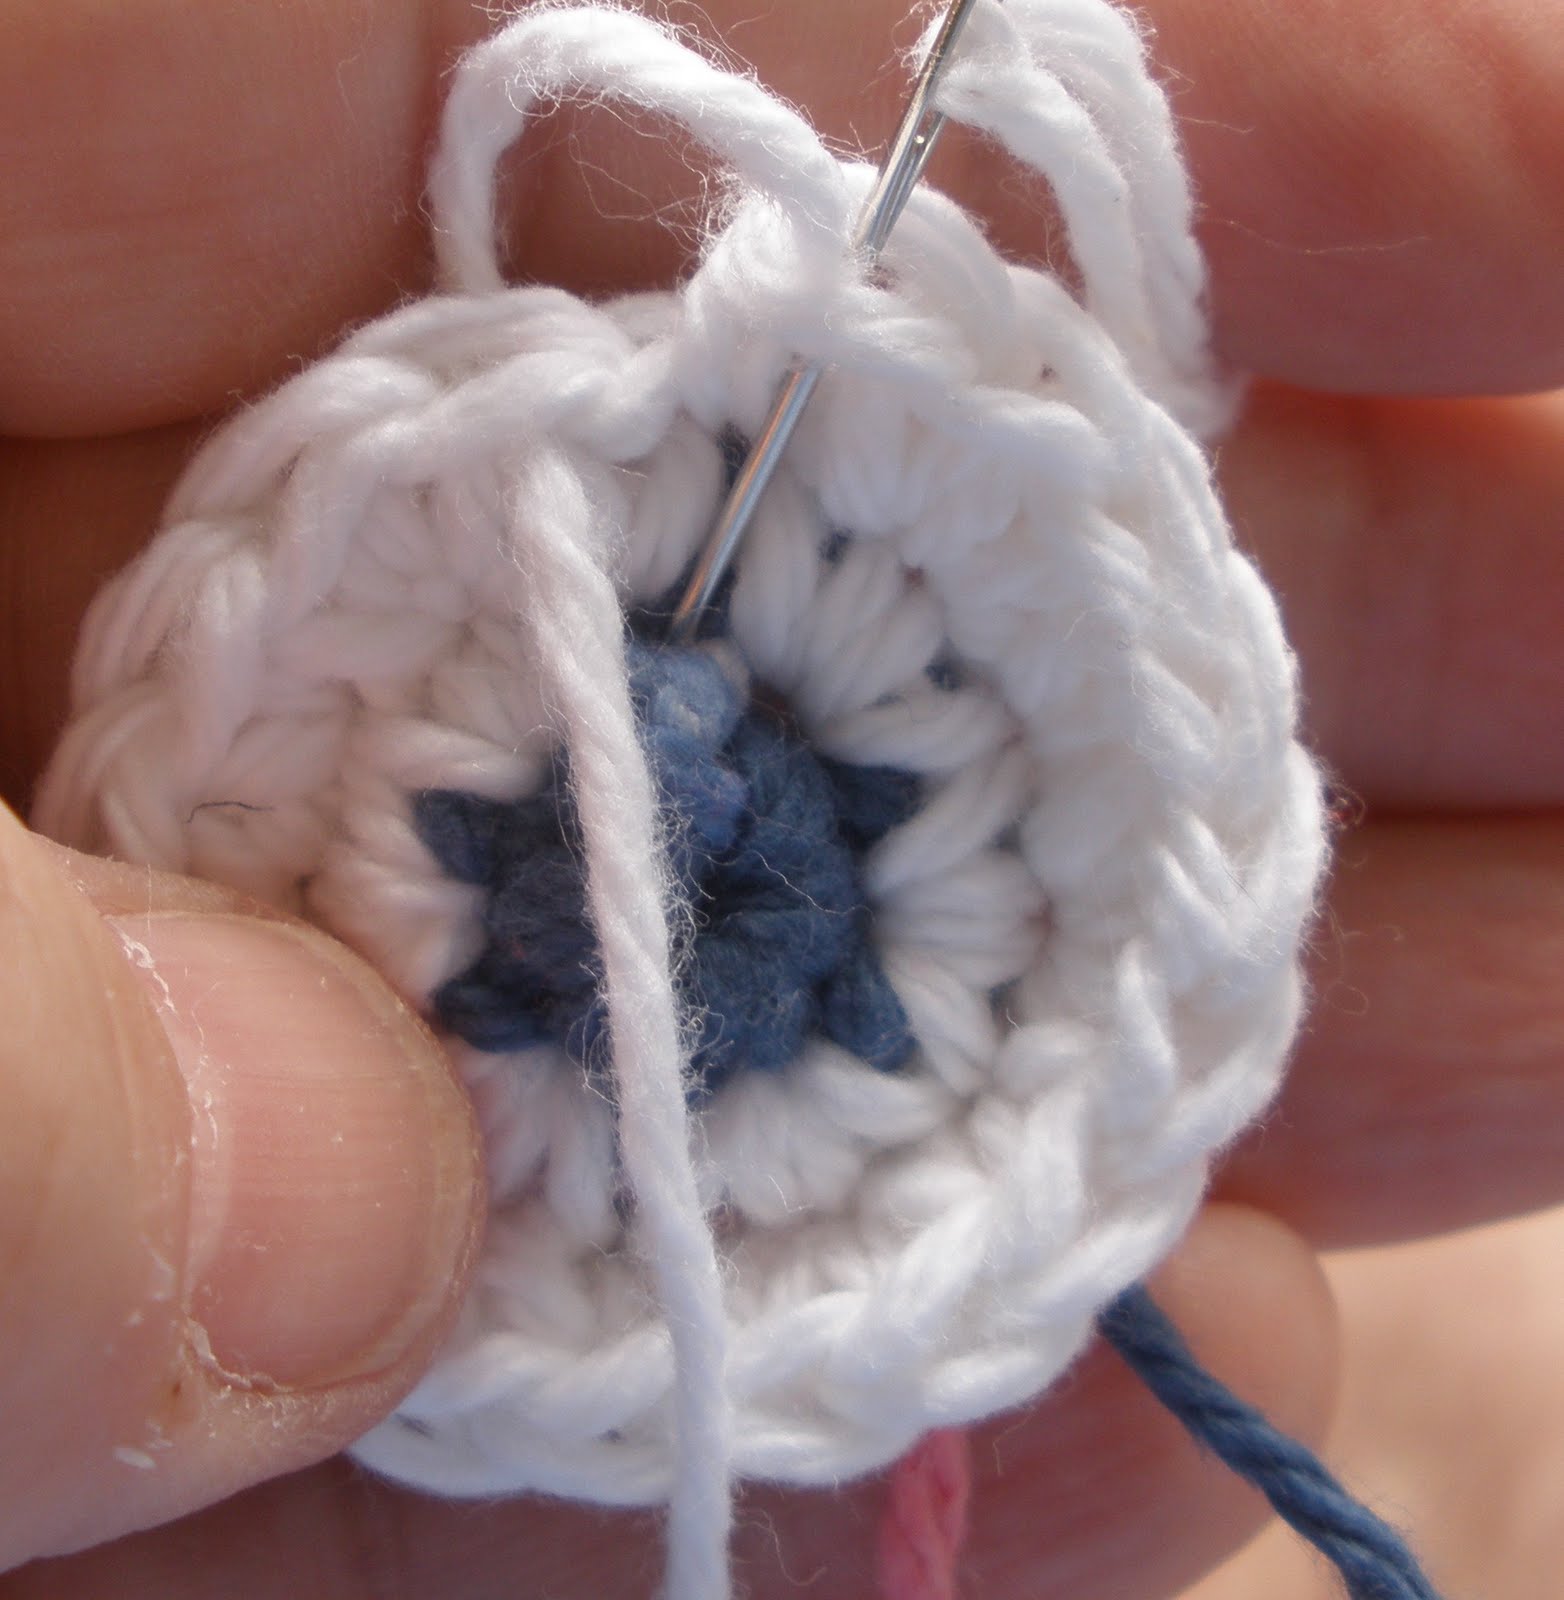 |
| You will notice in Step 12 there is some extra blue showing through. I have used my needle to cover it in this photo. NOTICE how I am fastening off . . . I have cut the yarn, placed it on a needle, ran the needle UNDER the next stitch and back through the middle f the' last stitch. To actually finish it off, the needle needs to go to the back and then weave in until it is secure. |
Step 16
 |
| I have pulled my yan too tight so you can see my join. DO you notice that the extra blue doesn't show through now? Before I wove in my tail, I did two long sts over that extra blue to hide it. |
Progression for a Circle.
Round 1: Sc around loop.
(I would suggest no fewer than 5 sc and no more than 12.)
Round 2: Sc in 1st st, *2 sc in the next followed by a sc in the next st,* rpeat to the end.
Round 3: Sc in 1st two sts, *2 sc in the next followed by a sc in the next 2 sts,* rpeat to the end.
Round 4: Sc in 1st three st, *2 sc in the next followed by a sc in the next 3 sts,* rpeat to the end.
Round 5: Sc in 1st four st, *2 sc in the next followed by a sc in the next 4sts,* rpeat to the end.
Round 6: Sc in 1st five st, *2 sc in the next followed by a sc in the next 5sts,* rpeat to the end.
Signed,
If You Have Any Questions, Just Ask


I like the change from the red center to the blue center.....it's magic! :o) xoxoxo been awol for a bit. work has been slamming me. i did post today though...go check out my flower vase!
ReplyDeletePaula! Hi .. its Emily .. My idea for a pattern was something that said "Sometimes life gets in the way" ..
ReplyDeleteand something on it to make it pretty ..